Author/Installer Gary Gilstrap
May 19, 2018
When I bought our retirement home in the north Georgia mountains 5 years ago I knew it had a dirt basement (aka crawl space) with no vapor barrier. Well, there were some random pieces of plastic sheeting here and there and even some carpet remnants rolled out, but that was it. I wasn’t too worried about it because the building inspector I used told me that it was the cleanest and driest crawlspace he had ever seen. Although he advised me to have a vapor barrier put down sometime, it wasn’t a priority to me based on his earlier comment.After all, the house was almost 30 years old and there were no problems down there.
A couple of years ago we decided to have an addition to the house. The addition had an unfinished cement floor basement.Totally separate from the other basement. Sometime after the addition was finished I was down in the crawl space changing a water filter and I noticed a pretty large area where the dirt was darker than the other areas.It looked as if it was damp. A few months later I noticed some mold starting to grow on the floor joists above that area. Something had changed and it is my thinking that grading for the new construction and trenches dug for new utility lines had changed the below grade water flow enough to create this new problem. Regardless of the reason something needed to be done.
I had the mold tested and it was not the dangerous type.I had it removed and the area treated and I started looking into vapor barriers. I watched videos by at least 10 companies and individuals on vapor barriers. After looking at the videos I decided that encapsulation was the way to go. The first quote I got from a industry professional - over $10,000.This was for a crawl space of 1875 sq ft. The second quote - similar. Next option - back to youTube.

I’m a pretty good Do-it-yourselfer. I have renovated a couple of homes and even had a Handyman business taking on small projects for a couple of years after I retired, so I decided I was going to do this thing myself. Next step was to decide what materials to use. My internet search led me to Crawl Space Repair. I was impressed with their products, prices, and helpful videos. I calculated how much material I would need and priced it. Wow, a lot more than the stuff they carry at my local home stores, but I wanted something super tough that would last and I wouldn’t have to worry about in my lifetime. I also wanted to be able to use the area for storage and be able to walk on without worry. The total cost for everything I would need was a little less than $1700, but the sure beats $10,000. And free shipping too!
I opted for the 20 mil Silverback for the floor area and 12 mil GuardianLiner for the walls. Seam tape, foundation seal tape and foundation pins finished the order. I was pleasantly surprised when 2 days after I placed the order with Crawl Space Repair the UPS truck pulled up with everything I had ordered.
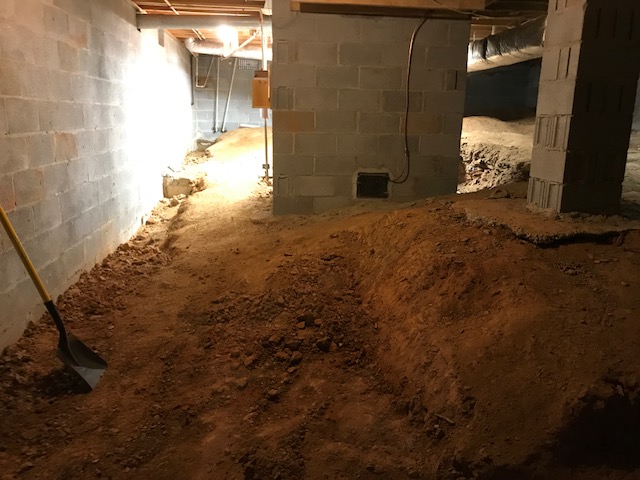
The first step of my new job was to prepare the crawl space by sealing all of the outside foundation vents and leveling out the floor area. Being in the mountains my home was built on a slope and the crawl space reflected that. In fact, to call it a crawl space feels like an untruth because I can stand up straight in three fourths of it. In what I call the short corner the distance from the dirt to floor joist is 30 inches, but in the opposite corner the distance from dirt to floor joist is 10 feet. There were trenches around the perimeter where the footings were dug.Some places two feet deep. There were big humps and holes everywhere. Also, because of the slope, level areas were dug out with paths to the furnace, water pressure tank and other paths where needed creating steps and pit areas.I used a pick mattock and square point shovel to do the digging. This was the hardest part because the dirt was very hard and, well, it’s just manual labor.I worked 2 to 3 hours each day for about 5 days to complete smoothing and squaring off the areas I needed to.Now it was time to start putting the vapor barrier in place.
The videos at crawlspacerepair.com were extremely helpful. As they suggest, I started with the walls. I ordered both 32 inch and 44 inch wall vapor barrier because of the low height in the “short corner” and the higher walls in the rest of the crawl space. I wanted to leave 10-12 inches turned out at the bottom to allow a good overlap with the flooring materials. As suggested, I rolled out and cut the pieces I needed outside of the basement in my carport. This allowed me plenty of open work area and kept the materials clean. I used a laser measuring tape which was a lot easier than single handedly fighting a tape measure over long distances. I installed the double sided foundation seal tape in each section as I was working along. The adhesive on this double sided tape is extremely sticky.Once it sticks to your fingers it is hard to let go of.To make sure the adhesive was properly seated on the block walls I used a J roller that I had from a previous project. The J roller provides greater pressure than you can with just your hand.Some of the vapor barrier wall pieces were pretty long and hard to wrestle with by myself, but by pulling the kraft paper backing to expose the foundation seal tape’s outer side as I went along the walls it went well. I suppose I could have used shorter pieces and overlapped and taped them, but I like the idea of a continuous membrane as much as possible. Next came the foundation pins.A hammer drill with a 1/4 inch masonry bit every 2 feet or so was easy work in concrete block, and tapping in the pins really made the vapor barrier feel permanent on the wall.I went around after finishing the pins with a broom and swept away the dust from the drilling that fell onto the turned out piece at the floor.

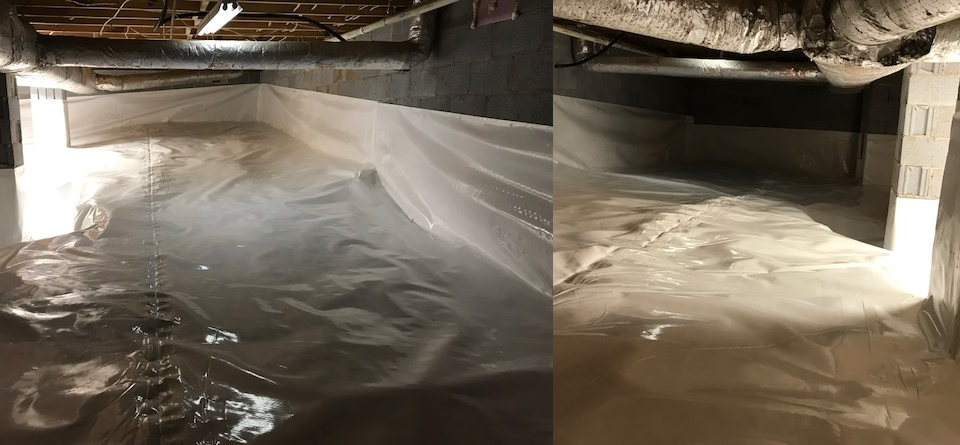
I thought the flooring pieces would be harder to handle than the wall pieces, but they were not. I looked, studied and figured which would be the best ways to roll pieces out to get maximum coverage with the fewest pieces and encounter the fewest obstacles. After cutting the pieces to length outside (you’ll need some heavy duty scissors for the 20 mil.) and bringing them into the basement they went down very easily.I only needed help with one piece that was 35 feet long. (Be aware that 20 mil reinforced vapor barrier has some weight to it. As with the long wall pieces, I could have used smaller pieces and overlapped and taped them, but as with the wall pieces, I liked having one continuous piece.) Taping along the edges went very smoothly with the seam tape. The seam tape from Crawl Space Repair is the stickiest and strongest tape I’ve ever used.It was a little tricky cutting and piecing around the stepped and pit areas, but the seam tape made it easy. The best part was rolling out each piece and opening up the fold to reveal all of that clean white vapor barrier. I worked from the farthest areas towards the door in order not to track dirt onto the vapor barrier. Putting shoes on and off was a bit of trouble but it was worth it to have the clean room effect in the end. Wrapping a few support pillars was all that remained and I was through.
Before I put down the flooring material I left a hygrometer in the crawl space overnight. The humidity level was 73% the next morning.I did the same the first night after I completed the encapsulation. The humidity level was 62% the next morning. An immediate result of 11% reduction in humidity.I’m now working with my HVAC person to open up some vents and returns on my air conditioning system down there now to create a conditioned space. That should further reduce the humidity and keep the air circulating.
Regarding my estimates for ordering materials. When laying the flooring I was about 8 feet short of the 20 mil flooring material roll. I used leftover wall material, double layers, to complete the floor area and when I had finished the job I had less that 3 feet of the 33 inch material left. I was short about 6 feet of seam tape to complete sealing the floor pieces of the last pillar wrap, and I was 4 foundation pins short. I had rather have been over by these amounts, but I was pretty close on my calculations.
Next step, I’m going to use the $8,000+ I saved by doing this myself to take my wife on a cruise this fall.