
HOW TO INSTALL A CRAWL
SPACE VAPOR BARRIER
Here is a straightforward step-by-step guide to installing a quality crawl space vapor barrier in your home. These are broad guidelines for you to follow that
will apply to all crawl spaces. If you need additional guidance for more specific problems, please contact us at 864-223-7800.
In the example below, we'll be using a 12 mil crawl space vapor barrier.
Information on Crawl Space Insulation can be found here — Crawl Space Insulation
Step 1: Access Your Crawl Space
Before you do any work in your crawl space, you should assess all areas, conditions, and problems. This will help you later to know exactly what you're up against.
Step 2: Lighting
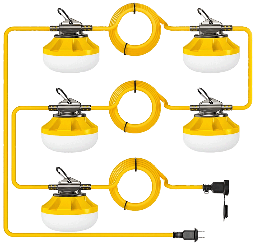
You may never have thought that installing lighting in your crawl space would ever be beneficial, but if you need to solve any crawl space problems, having proper lighting will be essential in your efforts. Depending on the current conditions of your crawl space, we suggest you first install temporary lighting and then wire in a more permanent solution once all of the moisture and water problems are resolved.
Step 3: Clean Out and Prep Work
Remove everything that is not dirt or attached to the house. Most often crawl spaces are the dumping ground for building and remodeling debris; all of it must be removed to avoid problems with odor, mold, and/or punctures. No matter how strong the crawl space vapor barrier is, there is a possibility of punctures from sharp objects like crushed rocks, broken concrete, and metal debris if they are not removed. IF something cannot be removed or is far too large or numerous to remove, you can use a protective underlayment like the Felt550® to prevent damage to your investment.
Step 4: Measure Your Crawl Space
You can guess at what you need to save time, but when it is time to spend your money, you will need and want to be accurate. To get a proper picture of what you will need for water control, you need to begin with selecting a crawl space vapor barrier liner and a proper crawl space dehumidifier. In order to purchase the correct amount of liner and the most effective dehumidifier for your crawl space, you will need to have some information about your crawl space, including accurate measurements of the crawl space. Below is a list of the information you will need to have.
- The length of ALL of the foundation walls
- The height of ALL of the foundation walls
- The location of the lowest point in your crawl space
- The location of your entrance/exit access to the crawl space
- The size of your access
- Do you have any water problems? Have you ever seen ANY amount of water standing in the crawl space? Are there stains on the foundation walls?
- Does your home have air conditioning?
- Does your crawl space currently have foundation vents to the outdoors?
Record all of that information and then create a drawing of your crawl space. This drawing will aid in the planning and the execution of your crawl space project.
Step 5: Product Selection
You will need to resist the urge to make Step 5 your first step, and this is the reason why: you should never try to make the crawl space fit the products; you should only select the products that fix the crawl space. Cost is certainly a very valid concern for most, but if you select a crawl space vapor barrier on price alone, you will no doubt get what you pay for. Or worse, you will pay too much for a cheap product, thinking it is better because a reseller calls an 8 mil thick vapor barrier a 20 mil thick vapor barrier in an attempt to make their price look cheap. However, we have to assume that both homeowners and installers want their work to be high-quality and last as long as possible and that product quality is a concern and that results are a must. Under that assumption, we recommend that anyone looking to make their vapor barrier selection use this link to check out nothing but the highest quality vapor barrier on the market.
Now it's time to get grizzly and start fixing that mess in the crawl space. The final 5 installation steps are as follows…
Step 6: Tools
As you may already know, it is definitely much easier, faster, and less expensive to complete ANY project when you have the right tools. Here are the tools to consider when properly installing vapor:
• Crawl space shovel
• Crawl space pickaxe
• Crawl space knife
• Replacement blades
• 100' tape measure
• Hammer drill (not a drill with a "hammer" feature)
• Reciprocating saw (for plumbing work, cutting roots and buried debris)
• Screw drivers
• Hammer
• Wire staples
• Electrical cords w/GFI
• Crawl Space Lights
• Respirator mask
• Organic mold cleaner
• Crawl space broom
• Small vacuum
• Heavy workshop paper towels
Step 7: Foundation Walls
This is the part of installation where install procedures widely vary from installer to installer. We will give you our recommendation of the best methods and processes to follow, based on our many years of experience installing vapor barrier. There are certainly some procedures and methods used by others that may seem faster or better on paper, but in practice, many don’t exactly produce the desired results. For the purposes of explaining the process and our methods for conducting the install, our example crawl space is going to be rectangular in shape, 30 feet wide and 60 feet long. It will measure 4 feet 3 inches high, and we will be installing the 12 mil GuardianLiner® vapor barrier. Using our recommended installation process, you will install the vapor barrier for the walls first. However, before you can begin attaching material to the walls, you will need to know how your floor will be covered, as in the sizes of the sheets of material covering the floor, how the pieces of material will be laid out and how close to the walls the material will reach once laid out, before you can begin installing the material covering your foundation walls. Consider the following facts:
- In our example our crawl space is 30 feet wide.
- The GuardianLiner® material is 13 feet 4 inches wide.
- For best results, the floor seam should overlap 10-12 inches.
- To cover the floor width, we will need 2 pieces of GuardianLiner® with the width of 13’ 4” lying side by side.
- 13'4" + 13'4" = 26'8"; minus the 12" lap seam, we can cover 25 feet 8 inches of floor width with two pieces of GuardianLiner®.
- We have a 30' wide crawl space; we have 25'8" of crawl space vapor barrier to lay on the floor.
- 30' minus 25'8" leaves us 4'4" short from covering the entire width of the floor.
This example demonstrates the reason we have to know the floor layout before we start cutting the material for the wall pieces. Now that we know how short our floor piece is from reaching all the way across the crawl space, we can make our wall pieces longer to cover the shortfall of the floor piece. We recommend hanging the wall pieces like wallpaper; in other words, the 13'4" width will go at the top and the bottom. This will give you many smaller pieces to handle rather than one large piece. The length of the wall section will equal the wall height, minus a 3" gap for termite inspections, plus the floor overlap amount and the amount that the floor piece is short by.
Using our example, we are 5 feet 4 inches short, so we would advise you to split it up equally on both sides. You will need a 2-foot 8-inch plus a 12-inch floor lap on each side added to the wall piece. Our wall height is 4 feet 3 inches, minus 3 inches for the termite inspection gap, and we are left with a 4' wall height + 2'8" floor piece we are short + 12" floor lap, equaling 7-foot 8-inch wall lengths. Wall seams (between each wall piece) should provide a 4- to 6-inch overlap. This will not come out to an even number, but regardless, this is how you figure out how many wall pieces you need.
Our crawl space is 30' wide and 60' long, thereby making our perimeter around the crawl space an even 180 feet. To calculate the proper amount of crawl space vapor barrier that will need to be cut, we will have to divide 13' (13'4" minus a 4" overlap) by 180', which gives us 13.8 wall pieces. You will then cut 14 wall sections to 7'8", and because we left 4" for the wall overlap and there is extra material, you can make the wall laps wider than 4", as you’ll have the extra material in the 14 pieces.
Make ALL of your cuts outside of the crawl space and then bring them into the crawl space; it makes the process much easier, faster, and cleaner. Before you cut, consider this— If the floor is short by 2'8" on the sides, you should make the length short by the same amount at both ends. This is because in a crawl space that is flat and the wall height is the same all around, you can make all of the wall pieces the same length, in this case 7'8", therefore not having to adjust at both ends with a shorter piece.
It does not matter what piece it comes from, the floor or the walls, because you are sealing it with the seam tape. Another reason is that the farther your tape seams are from the foundation wall, the easier it is to tape. If you are taping 2'8" away from the foundation wall all the way around the crawl space, it will be much easier for you, allowing you to do a much better job sealing the seams. So in this example your floor pieces would be 54'6" long. That will leave a 2'8" gap on the ends that will match the 2'8" gap on the sides.
The other thing to consider before you cut is to cut both floor pieces first, then make the wall pieces from what is left. In our example, we want two floor pieces at 54'6" long, and each of them is from one piece (no splices). This job will take three 13'4"x75' long rolls of GuardianLiner® to complete, if done correctly. If you cut ALL of the wall pieces first, one of your floor halves will be in at least 2 pieces, not one. This happens because 14 wall sections, each at 7'8" long, equal 108' of material.
You will get 9 wall pieces from one full roll, and then you will need 5 wall pieces from another roll. Those 5 pieces will take 38' 4" from the 75' roll. That roll is now 36'6" long, and you need 54'6", so you will have to take the 20' from the other floor piece (75' long minus 54'6" = 20'4") and tape it to the end of the other floor piece to get the correct length. It is not a big deal as far as function goes because you will tape the two together, but when it happens, you will tell yourself you should have cut the floor pieces first.
Brush using a broom, not a wire brush, the foundation wall at the top where you will be attaching the vapor barrier to remove loose dirt and spiderwebs. Next, install the Foundation Seal Tape™ along the perimeter of the foundation wall. You may need to use polycaulk if the foundation is very wet. Once the wall pieces are adhered to the Foundation Seal Tape and the floors have been taped to the walls, you can then install the Foundation Pins™. You will find videos for installing both the Foundation Seal Tape™ and the Foundation Pins™ at the bottom of this article.
Step 8: Crawl Space Floor
There is not much left to explain here. One advantage to splitting the floor width shortage of the crawl space vapor barrier into equal amounts on each side is that your center seam will meet at your row of support columns; therefore, cutting around them will be much easier. Always try and keep your vapor barrier pieces square to the crawl space.
Step 9: Taping
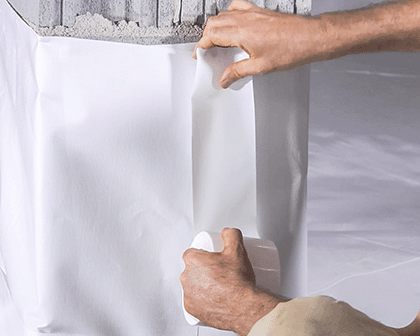
The StIckE® Seam Tape is designed to work with the above mentioned crawl space vapor barriers and will not come loose when it comes in contact with water; this is very important because many "crawl space tapes" unfortunately do just that. Take your time and remember to keep the crawl space vapor barrier square to the crawl space when you are taping.
Step 10: Conditioning The Air
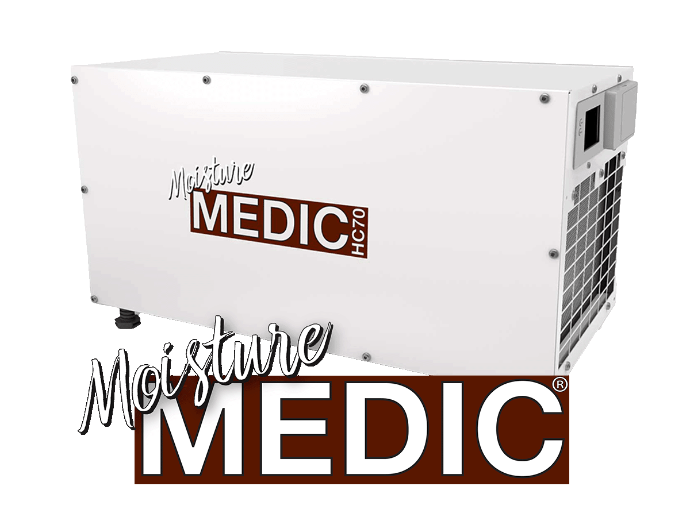
A conditioned crawl space can be accomplished a few different ways; what’s important is that you DO IT. Conditioning a crawl space is THE reason the crawl space needed to be encapsulated, so don't skip this part to save money. Would you buy a pool and not fill it with water because it was not included in the price or it would make the cost of the pool less expensive if you left it out? Conditioning can be done using a quality crawl space dehumidifier or by using your existing air conditioning unit. Both options have their strengths. The best way to know which is best for your home is to get a moisture management plan for your crawl space. You can read more about a conditioned crawl space here — Conditioned Crawl Space
Lastly, as a final tip, taking your shoes off while working in the crawl space after the floor barrier is laid will lessen the cleanup work later!
Below is a video on how to install a crawl space vapor barrier so that you can see it in real time.

To install this Web App in your ISO device press and then Add to Home Screen.