
Concrete Crawl Space Solutions
Main Topics
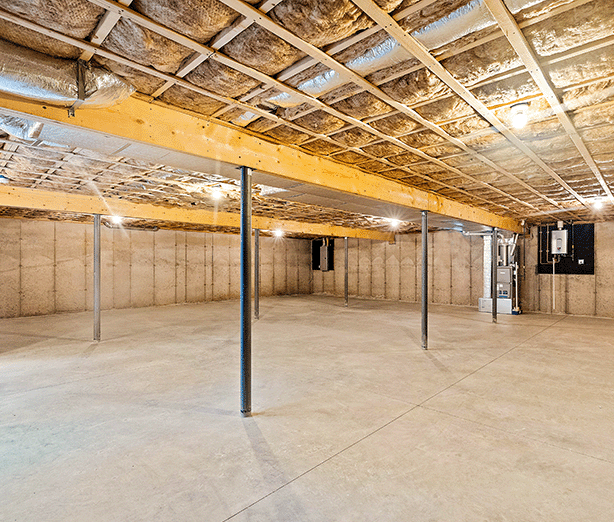
Concrete-floor crawl spaces are not as common, but they do have their advantages. For one, this type of crawl space design is more energy efficient than an open crawl space if constructed without foundation vents. This type of crawl space also offers homeowners another advantage, or "pro," by providing them with an additional durable storage option. Although many crawl spaces are too short for this option after the home is built, if that is not the case, and there is room to move around within the space, then it offers a lasting means for durable storage.
Another “pro” of having a concrete floor in the crawl space is that it acts as an excellent cap on odors. A crawl space with a concrete floor has far fewer odor problems than an open crawl space. The concrete floor prevents any gases, soil gas odors or bacterial odors seeping out of the soil from rising up into the crawl space and possibly into the home. The concrete crawl space design actually seals off the space, preventing contact between the crawl space and the ground.
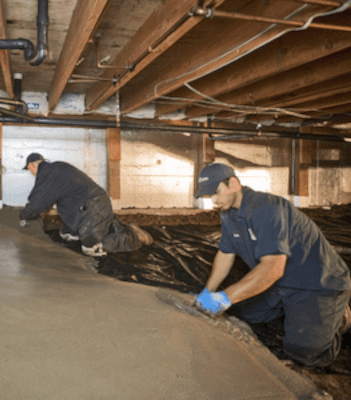
This design features a concrete pad called a “mud pad” that is poured onto the crawl space floor and essentially becomes a concrete barrier meant to help control moisture in the crawl space. There are different methods, tools, and components used to complete the project; some include the use of a crawl space vapor barrier, while some do not. The mud pad is often poured over a roughly graded dirt floor, where little prep work is done to flatten the area, so the concrete thickness can range anywhere from 2” to 6” thick. Although the final grade of the concrete will appear flat.
An experienced, knowledgeable contractor will install a vapor barrier on the floor prior to pouring the mud pad. This is done because the concrete itself is not a good moisture barrier. Water and moisture will pass through a concrete slab that does not have a vapor barrier with ease. In some cases, that easy passage of moisture through the concrete could lead to several problems. For instance, should a vapor barrier not be used in a vented crawl space and later the vents are sealed, the lack of that protective layer of vapor barrier will result in a highly humid space, which will lead to several problems for a home unless a dehumidifier is installed.
If a vapor barrier is used, then you will have more options on how to best control the humidity. Closing the vents is the key to fixing the cold crawl space problem.
The crawl space insulation installed in this application would be R-19. Install the insulation above the foundation wall inside the rim (or band) joist cavity only. Think of this design as a mini basement. If you are ever inside a full-size, unfinished basement, take a look up at the “ceiling” above you, and you will notice there is no insulation in the joist cavities. The most recent building code (IRC 2006) states that the insulation in the floor joist cavity is no longer needed if the exterior foundation walls are insulated. One option is to have (closed cell) spray foam installed on the foundation walls.
The real benefit here is to cover the portion of the foundation that is above the outside grade. The cost of this insulation is usually by the square foot, so the more you have sprayed on, the more it will cost. Do not have the rim joist sprayed with this type of insulation. You could end up with problems repairing or replacing any wood that may get damaged due to insects or water damage. It also does not allow for termite inspection, and that could be a huge issue if you plan to sell your home in the future. In addition, it would be a wise move to add a few heat ducts to the crawl space to keep the area warm.
A few words of caution: though this design is far superior to the open crawl space, it potentially has some of its own problems. Even with a vapor barrier under the mud pad, you will have to find a way to control the moisture that comes in the crawl space from the unprotected foundation walls. This area has the same potential for moisture and water problems as a mud pad that does not have a vapor barrier.
The concrete crawl space designs primarily feature one of two types of ventilation: foundation vents or ventilation using the forced air (furnace) system of the home. If the crawl space is ventilated using foundation vents and at some point it is decided to close and seal off the vents in this design, you will have to install a dehumidifier to control excess moisture.
Some of the possible cautions, negatives, or “cons” to keep in mind when thinking about concrete crawl spaces are the following:
1) Some are constructed with foundation vents, and if that is the case and the homeowner wants to be able to control the environment in their crawl space, the vents will have to be sealed and a dehumidifier will need to be installed in order to actually have a “closed” and “conditioned” crawl space where moisture levels can be controlled.
2) Most are poured as a “mud pad." A mud pad is a rough poured concrete slab whose sole purpose is to cap the earth under it—sometimes without a vapor barrier between the concrete and the earth. If there is no vapor barrier installed between the “mud pad” and the ground, then there is little to no protection for the crawl space against moisture penetration through the floor.
3) If conditions change and a water problem shows up, it can be very expensive to install a drain system in an existing concrete floor crawl space due to the height levels.
4) If the concrete floor is to be installed in a crawl space after the home is already built, the install will temporarily cause very high moisture levels in the crawl space due to the drying and curing process. This moisture will eventually dissipate, but until it does, it will need to be managed to prevent any new issues.
5) Unless you own and operate your own concrete company, the costs can be much more than your budget will allow. There is the cost of the actual concrete, the quality vapor barrier needed, the spray foam insulation, and any other possible components needed. Then, because DIY is most likely not an option, there will be labor costs to consider as well.
Another energy-efficient option to protect and control your crawl space that also takes advantage of both the “closed” and the “concrete” crawl space strengths, though more costly, is to encapsulate using concrete. This design is considered a conditioned crawl space, and it is one of the more energy-efficient and comfortable crawl space designs. It uses foundation insulation to control energy loss. This design requires sealing the walls with insulation to control the temperature within, and doing so also protects the crawl space from moisture penetration from the foundation walls. There are two types of insulation used in this design; they are rigid foam insulation and closed-cell spray foam insulation. Both of these types of insulation offer a level of moisture protection from the foundation walls.
This type of encapsulation also requires no open foundation vents; therefore, any foundation vents will have to be sealed. The most common source for ventilation in this design is to add a conditioned air supply to the crawl space. This ensures the crawl space is at its peak of energy efficiency.
Although this design offers many comforts, like the other concrete crawl space type, concrete-encapsulated crawl spaces are also very expensive. As time goes by, the cost of spray foam insulation will continue to become less expensive, but for now it is still on the high end of the options. In addition, there is the cost of a high-quality crawl space vapor barrier to be installed under the concrete and, of course, the cost of the concrete itself to consider.
Ultimately, going with this type of encapsulation requires careful calculation to decide if the investment will be worth it for the homeowner. When it comes to making decisions on how to best take care of your crawl space, it is much like deciding on how to best care for the rest of your home; you just have to consider your own individual financial circumstances and let that dictate the best choice for your home and your family.

To install this Web App in your ISO device press and then Add to Home Screen.